Desktop app: install and first run
The app is the local cockpit for the record →
compile → replay → teach loop: record on your own machine, compile into a
deterministic bundle with openadapt flow, then replay,
review, and teach corrections, all locally. Nothing leaves your machine unless
you explicitly push it to a cloud workspace.
Prefer the command line?
The desktop app and the openadapt flow CLI drive the
same engine; the app is a graphical front end over the same compiler and
governed runtime. To stay in a terminal, start with the
five-minute tour and skip this page.
1. Download and install
Get the installer from
openadapt.ai/download. The page detects your OS
and architecture and offers the right build. The current build is the GitHub
pre-release desktop-v0.15.0. It ships installers for Windows, macOS, and Linux
with SHA256SUMS, a CycloneDX SBOM, per-platform metadata, and build-provenance
attestations.
| OS | Installer |
|---|---|
| Windows | .msi or .exe |
| macOS (Apple Silicon / Intel) | .dmg |
| Linux | .AppImage or .deb |
The desktop app and openadapt flow use the same released engine. Browser
workflows can use the managed OpenAdapt Cloud runner; native desktop, RDP, and
Citrix workflows execute locally or in a self-hosted/customer-controlled runtime
and can connect to Cloud for signed task delivery and governed reports. Cloud
does not execute those local, native, RDP, or Citrix workflows: the configured
runner executes them inside its own boundary.
Verify the release if your OS asks
Check the release SHA256SUMS and provenance before you override a first
launch warning. Windows/Linux installers are unsigned and macOS installers
are ad-hoc signed. For platform-specific steps, see
troubleshooting.
2. Grant OS permissions
This is the #1 silent-failure mode
Until you grant the permissions below, screen capture returns a blank or black frame and input may go nowhere: the app looks like it is recording but captures nothing. The OS shows no error dialog; recordings just come out empty. Grant these before your first recording.
OpenAdapt needs three permissions to record: Screen Recording (to capture the screen), Accessibility (to observe and replay mouse and keyboard input), and Input Monitoring (to record keyboard and mouse input from desktop apps).
- Open System Settings (on macOS 12 Monterey and earlier this is System Preferences → Security & Privacy → Privacy).
- Go to Privacy & Security → Screen Recording. Toggle OpenAdapt on.
- Go to Privacy & Security → Accessibility. Toggle OpenAdapt on.
- Go to Privacy & Security → Input Monitoring. Toggle OpenAdapt on. You can also select Request access next to Input Monitoring in the app's first-run screen.
- Quit and reopen OpenAdapt. macOS applies a newly granted Screen Recording permission only after the app restarts. This is a macOS requirement, not an app bug.
If OpenAdapt is not listed, click +, then add it from /Applications.
If a recording still comes out blank, confirm all three toggles are on and
that you restarted the app after granting Screen Recording.
On Windows, capture and UI Automation work out of the box for ordinary windows; no permission prompt is needed for a first recording.
The one exception is elevated (administrator) windows. Windows blocks a normally-privileged app from seeing or driving a window running as administrator (UAC elevation). If the target app runs elevated, run OpenAdapt as administrator too (right-click → Run as administrator) so both processes share an integrity level. Otherwise capture of that window comes back blank and input is ignored.
For remote-session substrates (Citrix / RDP), see the troubleshooting guide for the session-0 / interactive-session caveat.
3. Verify with a test recording
Record a few seconds of any app, then stop (the same capture is available from
openadapt flow record on the CLI). If the frames
show your screen (not a blank or black image), permissions are correct and you
are ready to record a real workflow.
- Blank / black frames on macOS → Screen Recording is not granted, or you did not restart the app after granting it. Redo step 2.
- Clicks not captured on macOS → Accessibility is not granted.
- "Input Monitoring permission is required" on macOS → the recording didn't start because Input Monitoring is not granted. Turn it on in step 2, then start the recording again.
- One specific window is blank on Windows → that window is elevated; see the UAC note in step 2.
The troubleshooting guide covers these and other first-week failures.
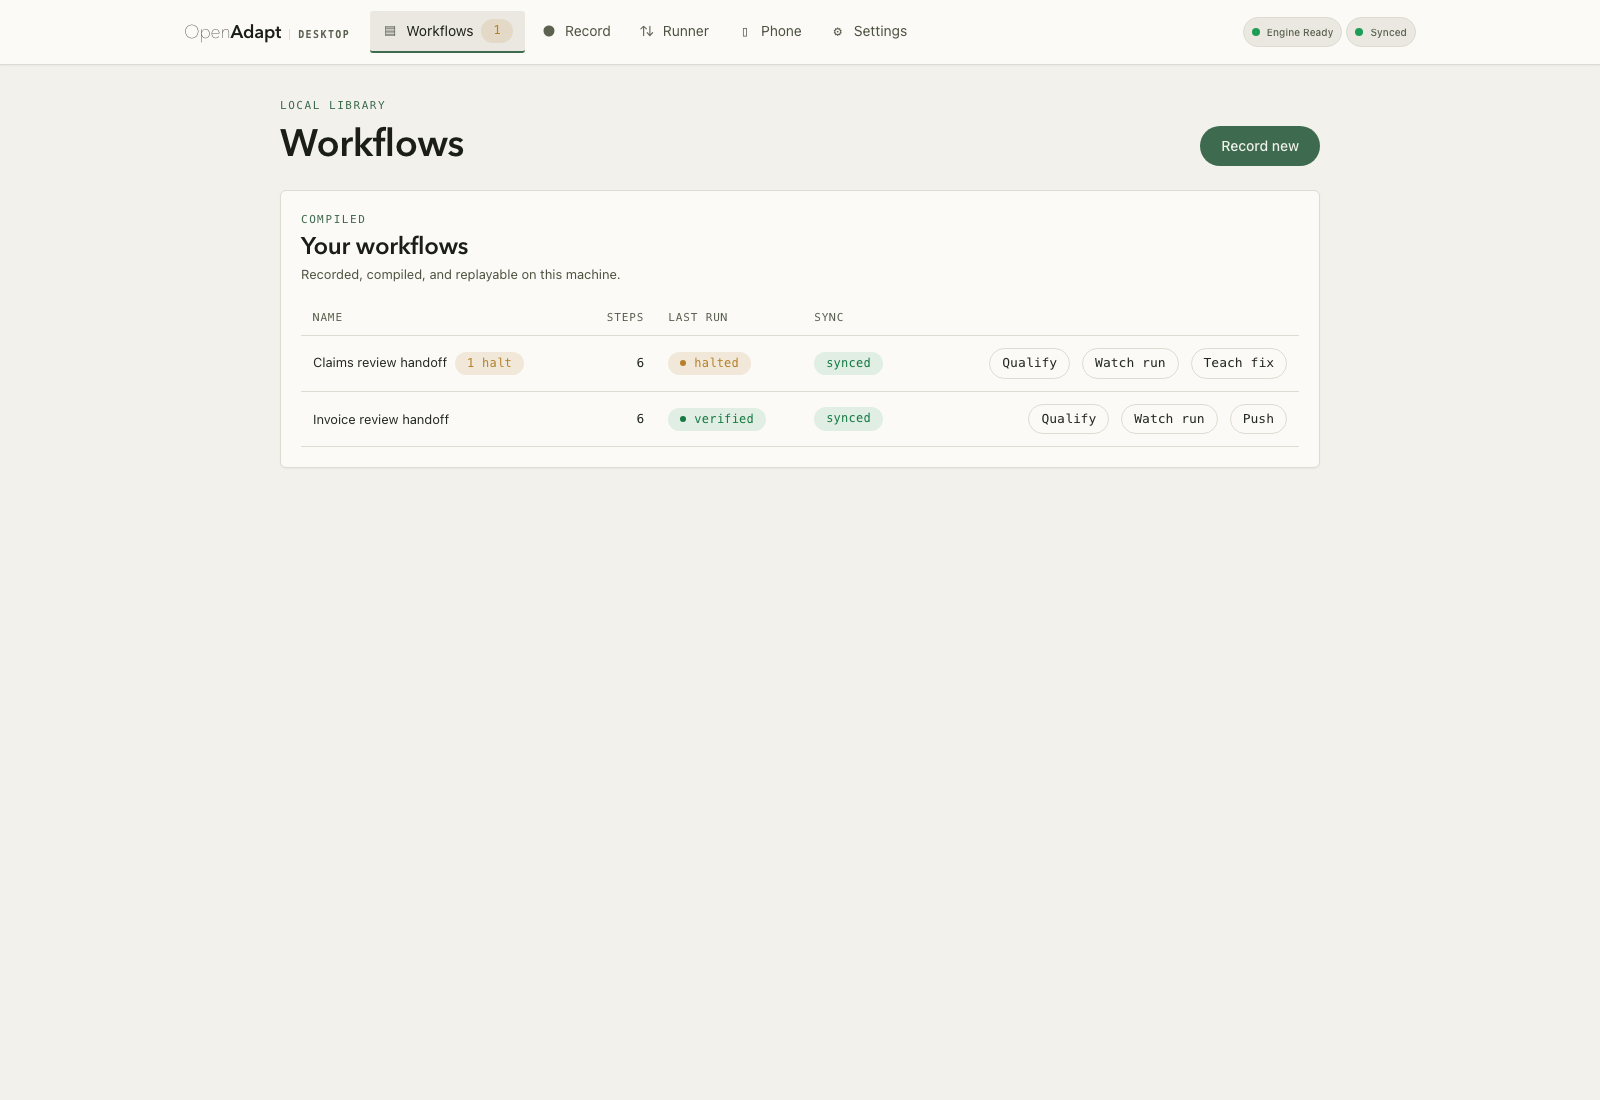
During a governed run
Desktop 0.15.0 can show a separate always-on-top status surface without adding anything to the target application. While OpenAdapt is observing or executing, the surface is non-focusable, ignores pointer input, exposes no controls, and is excluded from capture before it becomes visible. Controls become interactive only after the run reaches a safe paused or terminal state. The overlay reports runtime state; OpenAdapt never uses it as resolution or verification evidence.
For published footage, OpenAdapt post-composes the status surface onto a derivative as Guided view; Raw footage shows the immutable media. Guided target tracking appears only when the media digest, exact decoded frame, viewport mapping, and runtime-bound rectangle agree. The compact status capsule uses a bottom corner that does not cover the target or another protected region, and disappears if neither corner is safe. These presentation elements are not verification evidence and do not weaken the pointer, focus, or capture-exclusion boundary. Watch the public demo or review the exact released control-overlay contract.
Answer a pause from a phone
Desktop can connect the customer runner to the hosted decision queue. It can also serve the same closed-schema decision contract through a customer-hosted portal. The hosted queue omits screenshots and protected fields. The runner-local portal can show the retained evidence while it stays inside the customer boundary. In both lanes, the phone returns one signed answer from the actions that the exact pause permits. The customer runner then checks the live application again before it continues.
The three images below show the runner-local, full-evidence portal with synthetic OpenEMR data. They do not show the hosted no-image lane.
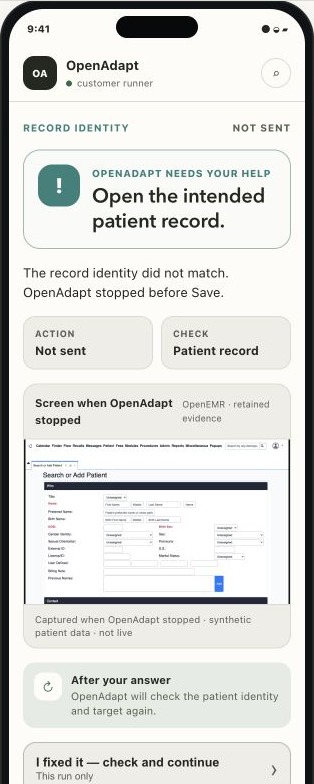
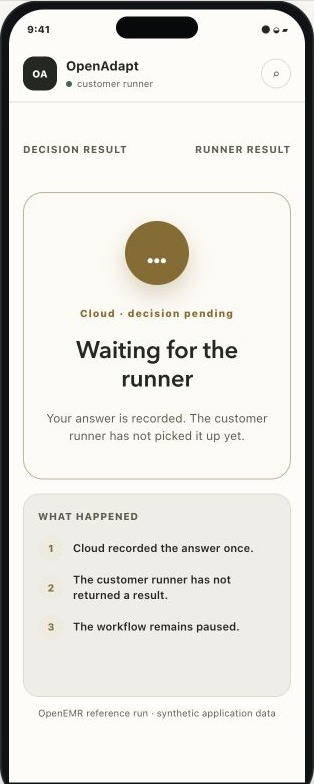
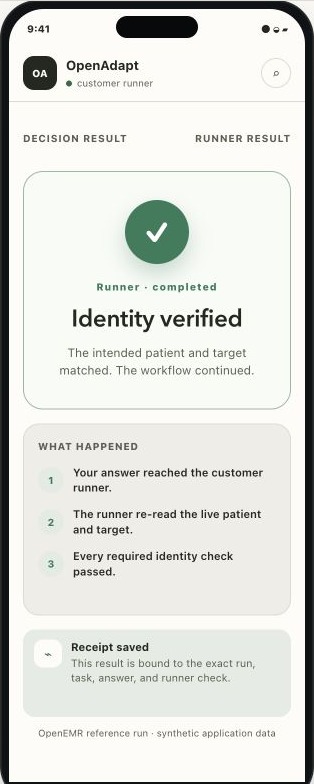
The hosted path uses outbound HTTPS and needs no inbound port. The self-hosted path stays loopback-only until the customer publishes it through trusted HTTPS or a VPN and explicitly enables that ingress. See Attended decisions and the halt-learn loop for the six request types, action effects, pairing sequence, authentication, expiry, and fresh-state checks.
Where to go next
-
Sign in, mint an ingest token, and push a recording to your dashboard.
-
The full record → compile → replay loop on your own application.
-
Blank capture, over-halting, a stuck offline queue, and the session-0 case.